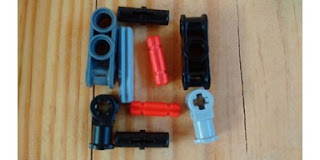
Overview
This mechanism can push easily if you add something to the front.
Step 1
Get the parts: a large motor, 4 black friction pegs, a 15 hole connector, a large gear (black), a small gear (black), 2 red axle pegs, at least a size 6 axle piece, an axle piece with a stopper on it, 2 size 3 axles, 2 connector pieces (axle and hole pieces), a 2 hole piece and axle connector, a 2 axle connector and a 1 hole connector piece, a 5 hole connector, and 2 loose gray pegs.
Step 2
Get these from your supplies: a small black gear and an axle piece with a stopper on it and a large motor.
Step 3
Put here : as shown in the picture.
Step 4
Get these from your supplies: a 15 hole connector and two black friction pegs.
Step 5
Assemble them like this:
Step 6
Get these from your supplies:
Step 7
Assemble them like this:
Step 8
Get these from your supplies: A large black gear, a size 3 axle, and a connector.
Step 9
Assemble them like this:
Step 10
Get these: A 5 hole connector, an axle-hole connector hybrid, and 2 loose pegs
Step 11
Assemble them like this:
Step 12
Put them together like this:
Step 13
Get these:
Step 14
Put these together:
Step 15
Put them like this:
Step 16
Put these together:
Step 17
Put these on:
Step 18
Get this: (can be longer)
Step 19
Put it on like this:
FINAL PRODUCT:
Alternative Implementations


No comments:
Post a Comment